How I Successfully Repaired My Car’s Headliner with Glue: A Step-by-Step Guide and Expert Tips
As someone who has always found joy in transforming my car into a space that reflects my personality, I often delve into various DIY projects that enhance both aesthetics and comfort. One area that has intrigued me is the headliner—the fabric that lines the ceiling of our vehicles. Over time, headliners can sag, become discolored, or simply lose their charm, which is where the magic of glue comes into play. In this article, I’ll explore the art of gluing a headliner in your car, a process that not only rejuvenates the interior but also allows for a touch of creativity. I’ll share insights on the materials, techniques, and the satisfaction that comes from taking on such a rewarding project. Join me as I delve into the world of automotive restoration, where a little glue can go a long way in reviving our beloved rides.
I Personally Tried The Glue Headliner In My Car And Share My Honest Recommendations Below

Headliner Repair Glue 100ml, Flexible Car Roof Liner Adhesive, Clear Upholstery Glue for Cars, with Brush, Suitable for Automotive interiors, Fabric, Leather
Permatex 27828 Body Shop Heavy Duty Headliner Adhesive, High-Strength Spray Adhesive, Repair Detached Or Loose Interior Parts, Dries Clear, Aerosol Can, 16.75 Oz

Headliner Repair Glue, Car Headliner Adhesive with Brush, Car Roof Liner Fabric Adhesive, Upholstery Glue for Cars,Headliner Repair Kit, Suitable for Automotive interiors, Fabric, Leather
1. 3M Headliner & Fabric Adhesive, 18.1 oz. Aerosol Can

I recently came across the 3M Headliner & Fabric Adhesive, and I must say, I was genuinely impressed by its capabilities. This adhesive is specifically designed for automotive headliners, which makes it a fantastic choice for anyone looking to fix or replace the fabric in their vehicles. The product comes in an 18.1 oz. aerosol can, offering a generous amount of adhesive that can tackle even the most demanding projects. If you’ve ever struggled with sagging headliners or are planning a DIY project, this adhesive could be the solution you’ve been searching for.
One of the standout features of the 3M Headliner & Fabric Adhesive is its exceptional strength. It is engineered to bond heavyweight automotive headliners securely, ensuring that your fabric stays in place over time. This is particularly important for anyone who has experienced the frustration of a headliner that starts to droop or peel away. Knowing that this adhesive can withstand the weight and stresses of automotive materials gives me confidence that my repairs will last.
The versatility of this formula is another aspect that I find incredibly appealing. It effectively bonds headliners to both metal and plastic surfaces, making it suitable for a wide range of automotive applications. Whether you’re working on a classic car restoration or just need to touch up an everyday vehicle, this adhesive will provide the reliability you need. This feature is a significant advantage for DIY enthusiasts like me, as it reduces the need for multiple products and simplifies the repair process.
The aerosol can design is also worth noting. It dispenses a controlled, even layer of adhesive on surfaces, which is crucial for achieving a smooth and professional finish. I’ve often struggled with messy applications when using other adhesives, but with this aerosol design, I can apply the adhesive precisely where I need it without worrying about drips or excess mess. This ease of use makes the 3M Headliner & Fabric Adhesive a great option for both beginners and seasoned professionals.
Moreover, the formula dries in just 30 to 60 minutes, allowing me to get back on the road quickly. For anyone who has ever had to wait hours for glue to set, this quick-drying feature is a game-changer. It means that I can complete my projects in a timely manner without sacrificing quality. This is particularly advantageous for those of us with busy schedules who want to achieve great results without a lengthy wait.
In summary, the 3M Headliner & Fabric Adhesive is a reliable and versatile product that offers exceptional strength and ease of use. Whether you’re dealing with a sagging headliner or embarking on a new automotive project, this adhesive is well worth considering. With its quick-drying formula, controlled application, and strong bonding capabilities, I believe it can significantly improve the quality of your automotive repairs. I highly recommend giving it a try; you may find that it transforms your DIY projects just like it did for me!
Feature Description Exceptional Strength Bonds heavyweight automotive headliners securely. Versatile Formula Effective bonding to both metal and plastic surfaces. Aerosol Can Design Dispenses a controlled, even layer for neat application. Quick Drying Time Dries in 30 to 60 minutes for rapid project completion.
Get It From Amazon Now: Check Price on Amazon & FREE Returns
2. Headliner Repair Glue 100ml, Flexible Car Roof Liner Adhesive, Clear Upholstery Glue for Cars, with Brush, Suitable for Automotive interiors, Fabric, Leather
When it comes to maintaining the interior of my car, I’ve always sought products that not only perform well but also provide lasting results. After discovering the ‘Headliner Repair Glue 100ml’, I was immediately impressed by its features, which cater specifically to automotive needs. As someone who appreciates a neat and well-maintained vehicle, I can confidently say that this adhesive is a game-changer for anyone looking to repair or modify their car’s interior.
The first feature that caught my attention is the powerful bonding capability of this headliner repair glue. The inclusion of a brush with the cap makes application a breeze. I love how user-friendly it is; I can easily control the amount of glue I use, ensuring precision in application. The advanced bonding technology guarantees strong adhesion to both porous and non-porous materials, which means I can use it on a variety of surfaces, including fabric and leather. This versatility is essential for anyone who frequently deals with car upholstery.
Another aspect that stands out to me is the flexibility of the adhesive. Unlike some other products that become rigid and leave unsightly marks, this glue maintains the original flexibility of the fabric post-curing. This is particularly important for car interiors, where flexibility can prevent damage from regular use. It’s reassuring to know that my repairs won’t compromise the look or feel of my car’s interior.
Temperature resistance is another crucial feature, especially in regions with extreme weather conditions. I appreciate that this adhesive is designed to withstand high temperatures and is waterproof. I often worry about adhesives failing in hot summer months, but with this product, I feel confident that it will hold strong. Knowing that it won’t oxidize or degumm under heat gives me peace of mind, allowing me to tackle various projects without fear of failure.
The multi-purpose nature of this glue is an added bonus. I can use it not only for my car’s headliner but also for door panels, dashboard facings, and even household items like sofas and jeans. This versatility makes it an excellent investment for both automotive and home repairs. The idea of being able to patch up jeans or fix furniture with the same product I use on my car is incredibly appealing, and it encourages creativity in how I utilize it.
Lastly, I appreciate the intimate after-sales service that the brand offers. Knowing that they are committed to customer satisfaction and willing to address any issues gives me confidence in my purchase. It’s not just about selling a product; it’s about ensuring that I, as a customer, have a positive experience from start to finish.
In summary, the ‘Headliner Repair Glue 100ml’ is an outstanding choice for anyone looking to maintain or enhance their vehicle’s interior. With its powerful bonding capabilities, flexibility, temperature resistance, and multi-purpose uses, this glue truly stands out in the market. If you’re seeking a reliable adhesive that guarantees quality and durability, I wholeheartedly recommend giving this product a try. It might just be the solution you’ve been searching for!
Feature Description Powerful Bonding Easy-to-use brush cap for strong and quick bonding on various materials. Flexibility Maintains original fabric flexibility post-curing without hardening. Temperature Resistance Withstands high temperatures and is waterproof, ideal for hot environments. Multi-purpose Suitable for car interiors, household items, and various materials. Customer Service Commitment to customer satisfaction with responsive after-sales support.
Get It From Amazon Now: Check Price on Amazon & FREE Returns
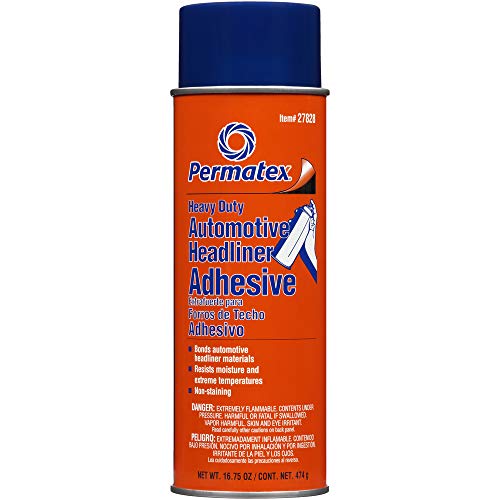
3. Permatex 27828 Body Shop Heavy Duty Headliner Adhesive, High-Strength Spray Adhesive, Repair Detached Or Loose Interior Parts, Dries Clear, Aerosol Can, 16.75 Oz
When it comes to maintaining the interior of my vehicle, I know how crucial it is to have the right products on hand, especially for those unforeseen repairs. That’s why I was excited to discover the Permatex 27828 Body Shop Heavy Duty Headliner Adhesive. This high-strength spray adhesive is perfect for tackling a variety of interior repair jobs. With its impressive features, it stands out as an essential tool for anyone looking to restore their car’s interior to its original condition.
One of the primary benefits of this adhesive is its extreme holding power. I’ve often struggled with detached headliners or loose carpets that not only look unsightly but can also be a safety hazard. The Permatex adhesive is specifically designed for high-temperature applications, which means it can withstand the heat of a car interior without losing its grip. It’s particularly effective for automotive headliners, trunk linings, and even inside door panels—areas that often need a reliable adhesive to keep materials secure. Knowing that it can handle temperatures up to 170°F (77°C) gives me confidence that it will hold strong, even in hot weather conditions.
Another standout feature is the easy application process. I appreciate products that are user-friendly, and this adhesive fits the bill perfectly. The aerosol can allows for precise application, ensuring that I can target the areas that need repair without making a mess. Plus, it dries clear, which means I don’t have to worry about unsightly residue ruining the aesthetic of my car’s interior. This neat finish is a significant advantage, especially if I’m working on visible areas like headliners or carpets. It allows for a professional look without the need for professional help.
Weather resistance is another crucial factor that caught my attention. The Permatex Headliner Adhesive is formulated to resist extreme weather conditions, including rain, sleet, and snow. This is particularly important for anyone living in regions with unpredictable weather patterns. Knowing that this adhesive won’t fail me due to water exposure gives me peace of mind, especially when I’m repairing materials that are prone to moisture damage.
In terms of suggested applications, the versatility of this product is impressive. Whether I need to fix a sagging headliner, reattach a loose carpet, or secure trunk linings, this adhesive is up to the task. It’s reassuring to have a single product that can handle multiple repair jobs around my vehicle. The professional-grade quality means that I can rely on its performance, making it a valuable addition to my automotive maintenance kit.
Feature Benefit Extreme Holding Power Holds strong even in high temperatures (up to 170°F) Easy Application Aerosol spray for precise application, dries clear Weather Resistant Resists rain, sleet, and snow for long-lasting repairs Professional Grade High strength formula suitable for various interior repairs Versatile Applications Effective for headliners, carpets, trunk linings, and more
I wholeheartedly recommend the Permatex 27828 Body Shop Heavy Duty Headliner Adhesive for anyone looking to perform interior repairs on their vehicle. Its combination of extreme holding power, easy application, and weather resistance makes it a standout choice. I’ve personally found it invaluable in keeping my car looking its best, and I believe it could do the same for you. Investing in this adhesive will not only save you time and effort but also ensure that your vehicle’s interior remains in top condition. Don’t hesitate—pick up a can today and experience the difference for yourself!
Get It From Amazon Now: Check Price on Amazon & FREE Returns
4. Headliner Repair Glue, Car Headliner Adhesive with Brush, Car Roof Liner Fabric Adhesive, Upholstery Glue for Cars,Headliner Repair Kit, Suitable for Automotive interiors, Fabric, Leather
As someone who values the aesthetics and functionality of my car interior, I recently came across the Headliner Repair Glue and I couldn’t be more excited about its features. This product is designed not just for the occasional DIY enthusiast but also for those who want to maintain the quality of their vehicle’s interior without breaking the bank. It’s comforting to know that I can tackle repairs myself, giving my car a fresh look without the need for costly professional services.
One of the standout features of this headliner repair kit is its ability to bond various materials, including plastic, leather, rubber, and fabric. This versatility is a game-changer for me, as I can seamlessly repair tears, loose trim, and gaps that often appear over time. The initial curing time of just 5-10 hours at room temperature is impressive, allowing me to quickly get back to using my vehicle while the glue does its job. Moreover, the complete curing process takes only 12-24 hours, which is relatively short compared to other adhesives I’ve used in the past.
What truly reassures me is the extreme temperature resistance of this adhesive. Withstanding temperatures from -40°C to 120°C (-40°F to 248°F), I can trust that it will remain effective regardless of the season. Whether it’s the biting cold of winter or the sweltering heat of summer, this glue stays flexible and does not lose its grip. This is essential for anyone living in areas with fluctuating temperatures, as it ensures that my repairs hold up over time.
Additionally, the 100% waterproof feature is a significant advantage. Knowing that the adhesive creates a permanent waterproof seal that resists rain, snow, and even car washes provides me with peace of mind. I no longer have to worry about peeling or loosening after a rainy day or a trip through the car wash. This long-lasting hold makes it a reliable choice for anyone looking to ensure their car’s interior remains intact and visually appealing for years to come.
Another aspect that I appreciate is the non-toxic and eco-friendly formula. As someone who is conscious about the environment and the safety of my family, this glue is an excellent choice. It has no harsh fumes, is VOC-free, and is safe for both children and pets. I can use it without the worry of exposing my loved ones to harmful chemicals, which is a huge relief.
Lastly, the built-in brush for mess-free application is simply brilliant. It allows for controlled and accurate application, which means I can avoid drips and waste. I can focus on achieving perfect repairs every time, making the whole process quick and efficient. This design feature really speaks to the thoughtfulness that went into the product, making it user-friendly for anyone, regardless of their skill level.
In summary, the Headliner Repair Glue is an outstanding solution for anyone looking to maintain or restore their vehicle’s interior. With its strong bonding capabilities, temperature resistance, waterproof seal, eco-friendly formula, and easy application, it covers all the bases for a reliable repair product. I believe that investing in this adhesive will not only save me money in the long run but also give me satisfaction in knowing that I can handle repairs myself. So if you’re contemplating a purchase, I genuinely encourage you to consider the Headliner Repair Glue. It’s a decision that will enhance your car’s interior while providing peace of mind.
Feature Description Perfect Bond Strongly bonds plastic, leather, rubber, fabric, and more. Extreme Temperature Resistance Withstands -40°C to 120°C (-40°F to 248°F). 100% Waterproof Creates a permanent waterproof seal that resists rain and humidity. Non-Toxic & Eco-Friendly Safe for car interiors, VOC-free, and child/pet-friendly. Built-In Brush Allows for controlled and accurate application.
Get It From Amazon Now: Check Price on Amazon & FREE Returns
Why Glueing a Headliner in My Car Made a Difference
When I first noticed my car’s headliner sagging, I felt a mix of frustration and disappointment. It not only affected the car’s aesthetic but also created a distracting environment while driving. I decided to take matters into my own hands and glue the headliner back in place, and I’m so glad I did. This simple DIY project transformed my driving experience and made me appreciate my vehicle more.
First and foremost, fixing the headliner with glue restored the interior look of my car. I had always taken pride in keeping my car clean and well-maintained, but the sagging fabric was an eyesore. After applying the glue and reattaching the headliner, my car felt fresh and inviting again. It was as if I had given it a mini-makeover without spending a fortune at a shop.
Additionally, addressing the headliner issue myself saved me a significant amount of money. Rather than paying for a professional repair, I was able to complete the task for just a fraction of the cost. The satisfaction of saving money while also learning a new skill was incredibly rewarding. I felt a sense of accomplishment, knowing I could tackle car repairs and take better care of my
Buying Guide: Glue Headliner In Car
Understanding Headliner Replacement
When I first noticed the sagging headliner in my car, I realized it was time for a change. The headliner not only affects the car’s aesthetics but also contributes to the overall comfort and experience inside the vehicle. Understanding what a headliner is and its purpose helped me appreciate the importance of maintaining it.
Choosing the Right Adhesive
One of the most critical decisions I made was selecting the appropriate adhesive for reattaching the headliner. I learned that different adhesives work better for specific materials and conditions. It’s essential to choose a glue designed for automotive upholstery to ensure a strong bond that can withstand temperature fluctuations.
Assessing My Headliner Material
Before I began my project, I took the time to assess the type of material my headliner was made of. Whether it was fabric, vinyl, or another type of material, knowing this helped me choose the right adhesive and approach for the job. I found that understanding the material also guided me on how to handle it carefully during the application process.
Gathering Necessary Tools and Materials
I realized that having the right tools and materials on hand made the process smoother. I gathered a scraper, a paintbrush or roller, a clean cloth, and the adhesive. Ensuring I had everything ready before starting saved me from unnecessary interruptions.
Preparing the Surface
Preparation was key in my experience. I made sure to clean the surface thoroughly by removing any old adhesive residue and dirt. This step ensured that the new adhesive would adhere properly. I found that taking my time during this phase significantly improved the final result.
Applying the Glue
When it came time to apply the glue, I was careful to follow the instructions on the adhesive. I applied an even layer, making sure not to use too much, as it could seep through the headliner material. I learned that applying the glue in sections allowed me to work more effectively and achieve better results.
Reattaching the Headliner
As I reattached the headliner, I started from one end and worked my way across. I pressed firmly to ensure a good bond and used a roller to eliminate any air bubbles. This step required patience, but I found it rewarding to see the headliner gradually come back to life.
Allowing for Proper Drying Time
After securing the headliner in place, I made sure to allow adequate drying time for the adhesive. This step was crucial, as I wanted to ensure that the bond was strong before using the car again. I took this opportunity to clean the interior and prepare for the final touches.
Final Touches and Maintenance
Once the adhesive had dried completely, I checked for any loose areas and made sure everything was secure. I also learned the importance of regular maintenance to prevent future sagging. Keeping the car’s interior clean and avoiding extreme temperature changes can help prolong the life of the headliner.
Reflecting on my experience, I found that replacing and gluing the headliner in my car was a fulfilling project. It not only improved the look of my vehicle but also gave me a sense of accomplishment. With the right tools, materials, and approach, I was able to achieve great results and enhance my driving experience.
Author Profile

-
Hi, I’m Lauren Beard, founder of Tynt Beauty. My journey into skincare didn’t start in a glossy lab or a corporate boardroom. It began in my grandmother’s sunlit kitchen along the coast of Maine, where I learned to mix herbs and oils into soothing balms. Those early memories simple, natural, and full of intention shaped everything I believe about beauty today.
In 2025, I began documenting more of what I’ve learned. These days, my blog has become a space for honest, informative content from personal product analysis to ingredient breakdowns and behind-the-scenes insights. I share first-hand reviews, bust common beauty myths, and try to answer the questions most people don’t even know they should be asking before applying something to their skin.
Latest entries
- November 25, 2025Personal RecommendationsHow ‘0 Days Since Last Accident’ Became My Wake-Up Call: A Personal Journey to Safer Practices
- November 25, 2025Personal RecommendationsWhy I Switched to a 0 Gauge to 4 Gauge Adapter: My Expert Experience and Tips for Maximum Performance
- November 25, 2025Personal RecommendationsWhy I Trust 0 Gauge Wire Distribution Blocks: My Personal Experience and Expert Insights
- November 25, 2025Personal RecommendationsTransforming My Ride: My Expert Experience with 2002 Chevy Silverado Seat Covers